


Do-it-yourself Stackable Compost Bins
We love this compost bin. It’s simple to build and so efficient for making compost. It was designed by the experts at University of California Cooperative Extension. Each 3-foot-square section is a separate, stackable unit. With these easy instructions, you can make as many units as you need. Total cost: $48.98 plus tax.
Supplies
| Material | We Used | Size | Qty. | Cost |
| Wood | Whitewood Fencing Picket | 1″x6′ | 60 feet | $19.90 |
| Wood | Furring Strip | 2″x2″ | 10 feet | $4.12 |
| Wood Screws | Flat-head Wood Screws | 80 | 1 lb. | $8.47 |
| Wood Sealer | Eco Wood Treatment | 1 pkg. | 1 gal. | $16.49 |
Easy DIY Directions
(See images below for the steps)
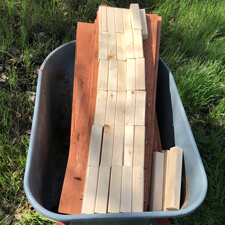
1. Saw wood into the following lengths. Or buy at a lumberyard or home improvement center where they will cut for you. We got our wood at Lowe’s and a very nice man cut all the lengths for us which was so much easier and faster than sawing it at home. (Figure A)
| Wood | Length | Qty. |
| 1″x6″ | 36″ | 8 |
| 1″x6″ | 34″ | 8 |
| 2″x2″ | 6″ | 16 |
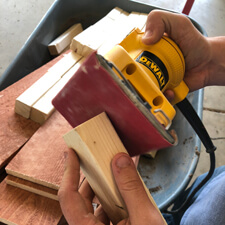
2. Optional: The edges of the wood were a bit rough, so we did a quick sanding of just the cut edges. (Figure C)
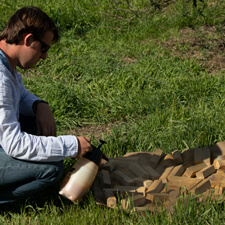
3. Optional: We sprayed all surfaces of the wood with Eco Wood Treatment. Do this the day before (or several hours) to give it time too dry. Beware: Eco Wood Treatment is a stain and will stain concrete, sinks, etc. We sprayed the wood on craft paper in the yard.
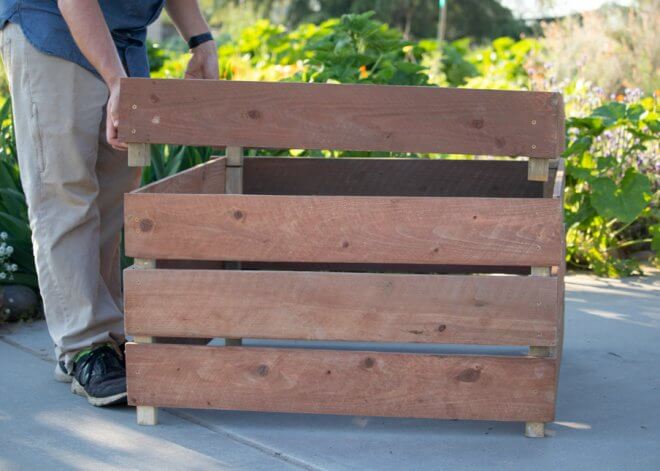
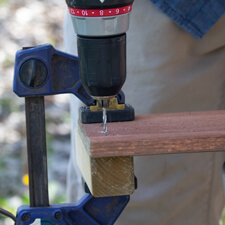
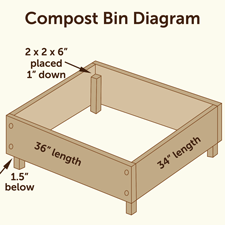
4. Place two 2″x2″s flush with the edge of the 34″ board lengths. There should be a 1″ offset from the top of the board. Drive two screws into the 1″x6″ and each 2″x2″. (Figure E and F).
5. Place a 36″ board length against the end of the 34″ length and 2″x2″ that are already attached. Then attach the 34″ lengths as shown in Figure F. You will now have a 36″ square.
6. Repeat the process for the remaining sections.
7. Simply stack the sections as you fill it with compost!


Love it! This makes so much sense to me. Thank you!
I hope it works for you, Jennifer!
The materials list is confused. To make a four-high stack, as in the photograph, you need 8 (not 10) of the 6ft. pickets and 16 of the 6″ 2″x2″s. To make a five-high stack, you indeed need 10 of the 6ft pickets, but you will need 20 (not 16) of the 6″ 2″x2″s.
David, thanks for doing the math. I’ll take a look at our structure, consult with our structural engineer and get back to you. 🙂
I just built mine! Thanks so much for the instructions.
Yay!
This look beautiful. It seems that with a small alteration in the corner posts, you could use the same pattern to make raised beds with a selection of heights (one level, two levels, etc.). You would just have to make the corner post equal in length to the height of the sides. The placement of the corner post an inch lower than the sides would keep that locking feature that lets them stack without falling apart and without hardware.
Thanks for the project.
You’re right and we did do this for a raised bed. Actually, we experimented with creating a potato tour that didn’t work out. So then we converted it to a bed to contain a couple types of mint plus a little nursery bed for gladiolus cormlets. Thanks for sharing! 🙂
To get ventilation gaps as in the image the 2 x 2s need to be longer than 6 inches (the width of the boards).
Ventilation needed varies by region. I’m in a really arid zone, so it doesn’t take much for ventilation. This works well for us. 🙂
Brilliant, just what I needed to see. Makes so much sense and I can adjust to size of my space. Thank you
I would cut all the fence pickets the same length. Then overlap the corners so each board runs long in one corner. This way you will have squares that will work in any orientation.
Here is an example of wrap around framing: https://projects.skillsready.ca/project/stepping-stone-part-i-of-ii/